Rigid Heddle: Weaving With Three Heddles
I’ve wanted to have a go at creating four-shaft textiles on a rigid-heddle loom ever since I brought home my Schacht rigid heddle more than a year ago. As my Schacht (not a Flip) only accepts one heddle reed, it wasn’t until I got my 12″ Ashford Knitters Loom (AKL) that I’ve had the capability.
It took something like six readings of the first half of “The Xenakis Technique For The Construction Of Four Harness Textiles”, by Athanasios David Xenakis, before I felt like I knew how to begin. The first time I read through Xenakis’ book, I was completely befuddled and nearly abandoned the project. At the second reading, I wondered if I were mentally deficient. But, around the time of the fourth — or possibly fifith — reading, I began to understand the technique, which is actually very simple. A hint: if you are feeling confused by the reading, it’s perfectly OK to skip past some of that and go directly to the description of the threading, if that is all you want. The book is very comprehensive, and most questions I had were anticipated and answered. On the subject of number of identical heddle reeds, Xenakis recommends three, although he maintains one could get by with two and a rod with doupe heddles. But, beyond the assertion that doupe heddles would work, Xenakis does not give any details how to use them.
Because my heddle blocks could only accept two reeds, I had my LWS (local weaving store) special-order me two, in the finest size available, 12.5-dents per inch. My reasoning was: three reeds may not fold compactly in the loom, I might have trouble with standing the third heddle up/down/at rest, and it would be easy enough to try with the doupe heddles first.
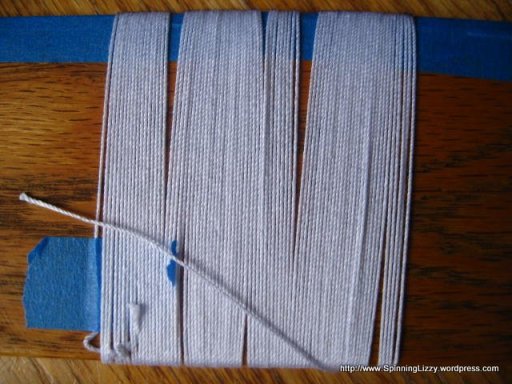
With that in mind, I wrapped some thin crochet cotton around the widest sword I had:
Mark one side of the threads as a reminder where to fold the string:
Fold the string at the marked points, and make a knot, leaving a loop large enough to fit over a heddle rod.
Please refer to Xenakis’ book for how to thread the loom (the time it would take me to write it up is time away from weaving!). Ashford puts out a pdf file that details how to thread two heddles here, as does Schacht here. Again, the reason I’ve gone with the techniques in Xenakis’ book is because I wanted to be able to methodically translate, set up, and weave some of the many drafts found in books of four-shaft patterns.
To make things easier on myself, I placed painter’s tape along the tops of the heddles, and marked off measurements; by ticking off the areas I had already threaded, it was easy to keep track of where I was, should be, or needed to go next. Colour-coding a threading sequence also helped me to keep my place.
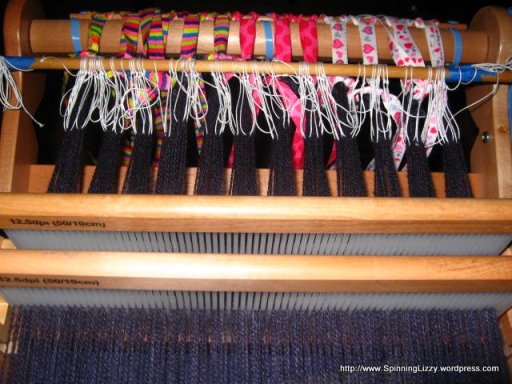
A view of the threading from the back with the doupe heddles at the bottom:
As to threading hooks, I used at various stages a regular hook, an ultra-fine spinning wheel orifice hook, and a long 11″ weaving hook.
I chose “Rose Path Project No. 1”, threading #1, treadle sequence IX, by Bertha Frey in Marguerite Porter Davison’s “A Handweaver’s Pattern Book”. After all bouts were tied and adjusted, I wove a header, using compressed plastic bags for filler.
Unfortunately, I could not manipulate the doupe stick with doupes very well; the resulting sheds were not separating cleanly. Then, I found that difficult as it was to create a shed by pulling up on the doupe stick, I had no easy way to create the reverse shed by pulling down on the doupe stick. With the addition of two heddles in front to manipulate in tandem, it was too much for me to handle. Perhaps it would be easier on a different loom than the AKL; I’d love to hear from you if you’ve used the doupe heddles successfully.
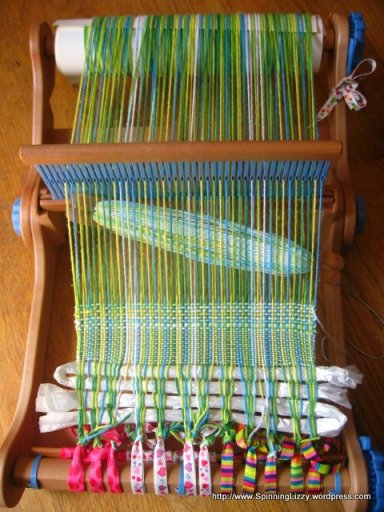
Fortunately, I knew that my LWS had ordered extras of my heddle reeds when I placed my order, so I only needed enough patience to wait for the next morning for the third heddle, rather than the two weeks I had waited for the second. Three heddles threaded:
The third heddle is a huge improvement over the doupe stick and heddles! The difference in the cleanness of the shed, and ease of manipulation, is more than worth the price of the third heddle.
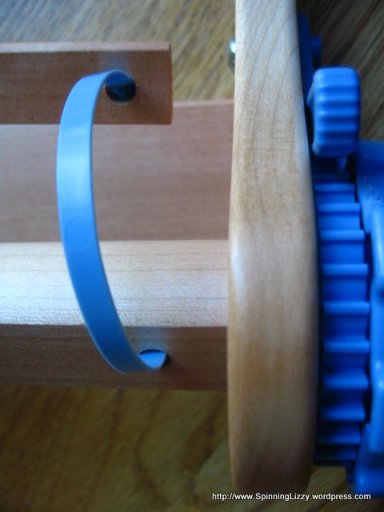
Did you note the angle at which the back beam sits up from the table? That produces a better shed, and it is engineered by design with the addition of an L-shaped brackets (blue, shown below) on each side of the loom:
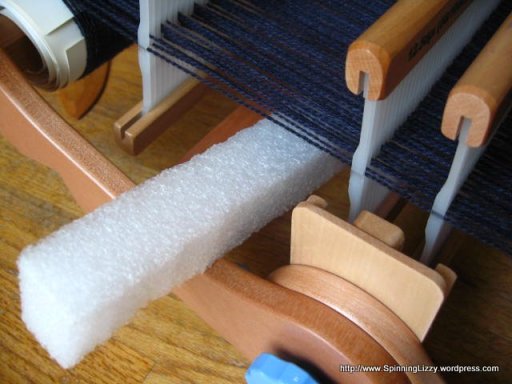
Because the heddle block only accommodates two heddles, there is nowhere to rest the third heddle. Left to its own devices, it weighs down on the threads, creating an unwanted shed in “rest” position. To remedy this, I propped up the third heddle with a foam bar inserted over the cross brace. It’s nothing fancy, really, just some old white foam computer packing, cut into a strip about an inch thick, and just long enough so it holds itself in place by friction.
With the third heddle resting on it, the threads stay in neutral position.
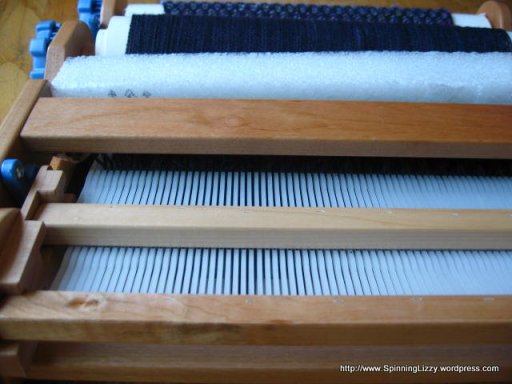
I keep the foam bar in place at all times, even when the loom is folded with all three heddles sandwiched inside:
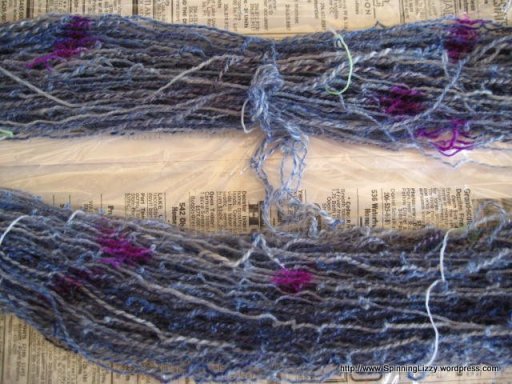
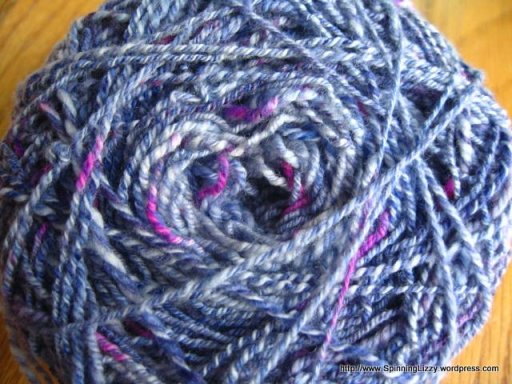
I had chosen some of my hand-spun wool for the weft, but when I took a last look before weaving, it needed some livening colour.
I pulled out my Mother MacKenzie Miracle (acid) dye kit, which was in liquid stock solution made before Thanksgiving 2008.
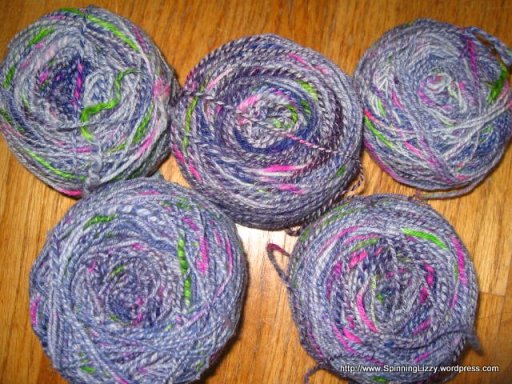
A few splashes of magenta, a heat-set in a crock pot, and the results:
Unfortunately, still boring. More liveneing needed; another day’s wait to go back to the dyepot to add some chartreuse:
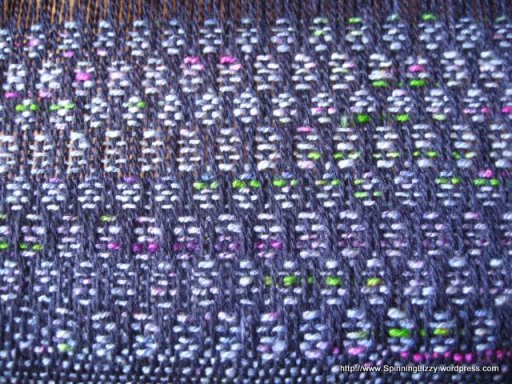
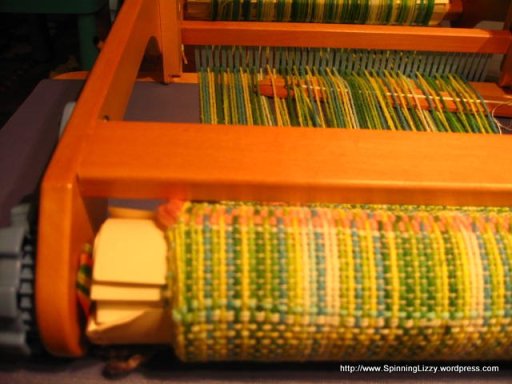
I had chosen my pattern with ease of threading and “treadling” in mind. As a first project, I did not want to be bogged down with complicated and long treadling sequences, and so, mine has only two sequences, each repeating two tie-downs. Really, only four positions of heddles to remember, and very easy ones at that. The cloth in progress:
In the future, I will likely continue to choose patterns with simple treadle sequences, but will also likely try more complicated threadings. It’s so tempting to finish off this scarf quickly at home, but I’ve purposely held off from doing so; I want to keep the AKL for use on the go, for something fun to do while waiting to pick up my son. Now both of us are waiting for classes to start up again.
Ashford Knitters Loom
The Ashford Knitters loom is one that was not on my list of rigid-heddle considerations. I had seen pictures of the blue plasticky ratchets and pawls, seen that the wood was not maple, knew that the marketing was aimed at luring knitters down the weaving slope (I had already slipped, so what was the point?) and never gave it another thought.
However, while seriously considering a Schacht 15″ Flip loom, several things happened almost simultaneously:
- I’ve been chauffering my son to more classes, and wanted slim loom I could carry around easily
- I saw a 15″ Flip in person, so felt how heavy and bulky it was
- I came across a fantastic deal on a 12″ Knitters loom that had only been used once, and
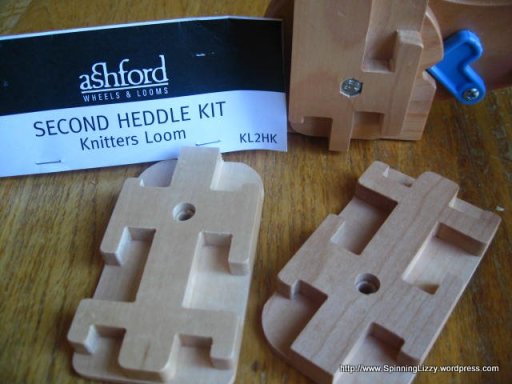
- I discovered that Ashford recently released a second-heddle upgrade kit.
My loom came with all the original accessories, plus a carrying tote.
The tote bag is very well designed; heavy-duty and well-padded, with long shoulder straps (not adjustable, though), and handy side pockets with some sewn thoughtfully narrower to accomodate long thin objects you might need to have on hand, like swords and stick shuttles. The bag is closely fitted to the loom, with enough room for a book (or two) and some yarn. I did find that the 7.5-dent heddle it came with to measure 11-5/8″ in length, and can’t help feeling a tad cheated of the last 3/8″. I suppose 12″ sounds better than 11″ for marketing purposes. While I waited for the second heddle upgrade kit and additional heddle reeds I ordered to arrive, I put on a first warp.
The warp is a scant three yards of thick Lily Sugar ‘N Cream cotton, with more of the same for weft. It turned out to be too much of this type of yarn; a brace across the loom close to the cloth beam limits how much I could wind on. I had to jam in the last foot or so of cloth. This is the loom pictured from its underside, showing the cloth crammed into the brace:
I used the shoestring method of speed-warping by Nadine Sanders,The Singing Weaver, which contributes a little bulk to the front. The brace on the other end is farther away from the back beam, so the cloth beam will be the limiting factor to the length of the warp. Thinking “scarf”, rather than “valance” is probably an good idea for warp length on this loom.
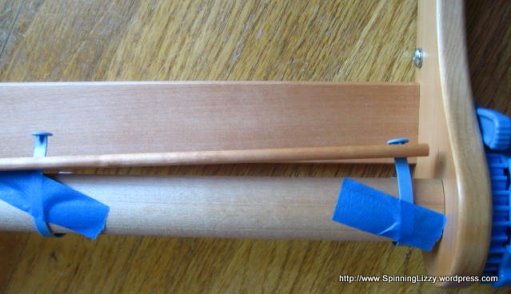
One thing I did not like were the blue plastic ties attached to the front and back beams. They are very springy, and push the attached stick away from the beam, making the warping process difficult.
However, when I tried to substitute texsolv, I found I could not thread it in the holes of both the beam and the stick. When I attempted a work-around with a metal rod inserted at the beam to hold the texsolv, I found the texsolv added substantial bulk when winding up the stick.
When I tried to exchange the stick for a second rod, I discovered that the combination of the stick and plastic ties would wind around the beam until the stick sat perfectly on the flat side of the beam. So, I reverted to the plastic ties, which turn out to be a marvel of thought and economy of space. In fact, as I started to use this loom, again and again I marvelled at the insightful engineering design at every turn.
As to the springyness of the blue plastic ties, I used a bit of blue painter’s tape to tame them.
I wanted to reduce the bulk of shoestrings in the front, so attached a metal rod to the wood stick with texsolv. I would thread the uncut ends of warp onto the rod to save myself the time of tying on and the bulk of knots — even though that would entail winding onto the front beam, threading the heddles, tying on at the back, and the extra step of re-winding the warp to the back beam.
Another example of the Ashford engineering thoughtfullness can be seen in the pair of blue, plastic, L-shaped pieces, found on both sides of the loom just behind the heddle blocks. One is pictured below with the single and double heddle blocks.
These two L-shaped pieces prop the back beam so it’s up at an angle from the rest of the loom, and so improves the shed.
It was quick to install the second heddles on the Knitters Loom; a few taps with a hammer to remove the bolts from the original heddle blocks and put them into the dual ones was all it took.
The loom is easy to fold with the weaving in place; put the weft-filled shuttle between a shed to lock it in place, put the heddle in the “travel” position (the lowest notch in the heddle block), then fold. I found the loom to be sturdy, extremely portable, and just plain loveable — I’m crazy about this loom! It’s lightweight, without being a lightweight, if you know what I mean.
Update, 2010 2 January: Using multiple heddles on the Ashford Knitters Loom
