Decluttering: The Saga Continues
A week ago Friday morning.
The house was a mess. I was up to my eyeballs in weaving paraphernalia. And my son’s toys. It’s my first free morning in a month, and I’m supposed to be decluttering the house. What did I do? If you thought: “turn on the computer and search ‘loom’ on Craigslist”, Bingo!
There, on the computer screen, read “My Drum Carder for your Loom?”. Someone was interested in trading a brand-new Fricke’s Finest drum carder for a loom. Hmmmmm… trade something very large for something much smaller…? I would be: 1) cleaning up house, 2) making a lot more space available, and 3) letting someone make use of a loom that I had not been able to find time for. Sounded like a grand scheme to me!
I’d been storing this loom for several years. I had the idea that I would move it into the house, and perhaps sell my countermarche Bergman. But, I’m so emotionally attached to my Bergman, I couldn’t make it happen. Added to that, my Bergman folds when not in use, but this loom is like a large, open box.
Anyway, I wasn’t extremely serious about this to begin with. The Craigslister must be getting a dozen different offers from other weaving nuts aficionados like me whose burgeoning loom herd is clamouring for a culling. Plus my loom was in pieces, in storage, and I’d never assembled it before. There would be some work involved in getting it ready, and there was not an uncluttered square foot in the entire house — all that work and not be chosen?
I received a polite reply the same day, expressing interest in seeing the loom. It occurred to me that even if I didn’t trade away this loom, I might like to play with it for a while. Weave a thing or two before putting it away. When I brought this loom home, I knew it had extremely beautiful bones. Solid oak wood, and truly easy on the eyes.
By Friday evening, I decided I would move my car out of the garage and spend the next week setting the loom up there. I awoke on Saturday, ready to start right away. There were a lot of pieces, but most everything was bulky rather than overly heavy. While taking the pieces out of storage, I found no less than three bags full of raw fleece (2 alpaca, 1 romney!) that I had completely forgotten about. Perhaps this was meant to be.
I was surprised because it didn’t take much time to assemble at all. Also surprised by the incredible workmanship involved in making this loom. This loom was handmade in 1974, and modeled after the Glimakra countermarche. I think it was the first and only of its kind.
The Shaw Island Fleece Company (Shaw Island in the San Juans) didn’t produce any internet hits.
The actual assembly went very quickly, but I spent a lot of time with the loom on Saturday, enjoying its beauty. I finished all the assembly on Saturday, leaving only the friction brake to connect later.
DH came to check on me every now and then while I assembled the loom. He, whose comments are usually something along the lines of : “I’d rather be tortured than do that,” (when he sees me weaving) sang a much different tune.
The first time: “What a beautiful loom!”
My reply: “Isn’t it?”
A bit after that: “Of all your looms, this is the most beautiful!”
I retort: “Gee, thanks, honey.”
And a little later: “It’s obvious that whoever crafted this loom knew a lot about woodworking. All the pieces were made to fit together perfectly. It’s not like today’s stuff where they just hammer and screw things together until they fit.”
I snap: “Uh, OK already, honey.”
And later still: “You know, this wood is not made of your average two-by-four. It’s probably not eco-friendly — it looks like old-growth wood; you probably couldn’t buy this kind of wood today.”
I exclaim: “I can’t take it any longer! Stop it, stop it, stop it! If you keep going on like that, I won’t be able to give up the loom!”
That shut him up. I think he was envisioning the space he’d reclaim when it was gone.
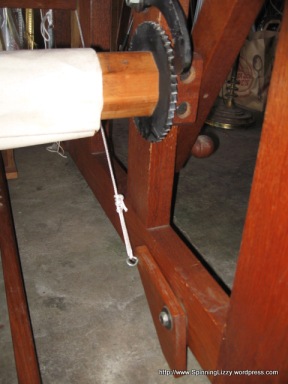
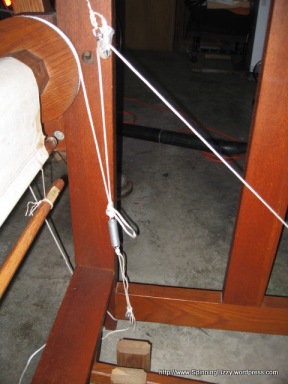
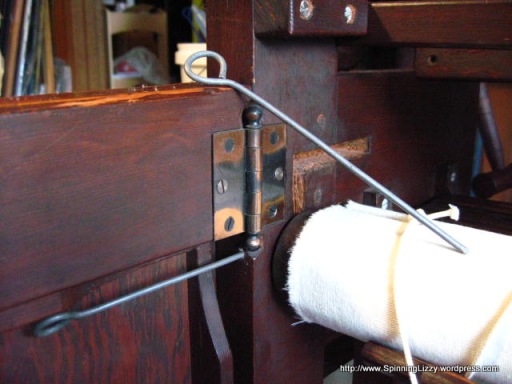
On Sunday morning, I tackled the friction brake. I spent some time unsuccessfully trying to puzzle it out. I was in a quandary. If I figured it out, I had to give up the loom. If I didn’t, I would get to keep it (I envisioned it working with counterbalanced weights…). But that was the sort of detective loom work I liked best, and I couldn’t give up. It didn’t make sense to me that the friction brake would not work. I kept thinking that this loom was lovingly handcrafted, and well cared-for.
As there is a brake pedal in the front of the loom, I just couldn’t believe someone would have spent so much time and energy to craft this loom and not have the brake working.
Finally, just when I had given up on a solution that day, DH came by again to comment on how very beautiful the loom was, and insight flashed into my mind. (A knot needed to be tied above the spring; what elegant engineering is this type of friction brake!) Solved! Rats! I was torn between pride and irritation. And I felt sad, because it meant goodbye to the loom. I was tempted to throw a quick warp on the loom, but finally decided against it. Weaving on it might make the loom impossible to walk away from.
I exchanged frequent e-mails with the Craigslister, Roxi, also a Raveler, who is probably the best choice for the loom if I had had to pick someone. Roxi wanted the loom, and made arrangements to pick up the loom the following Saturday.
During the week, I was overwhelmed with remorse — I really didn’t want to trade the loom. While a drum carder would be nice, it’s not something I really had to have, as I have a huge ready-to-spin fibre stash, and I’ve never had any complaints using hand carders.
I called my clutter buddy, Magda, for help. Magda has been encouraging and helping me to get my house into shape. Even with her busy schedule and a three-hour time difference, Magda made the time to talk me through this situation. I cried to her: “Waaaaaaaaaahhh! It’s special! It’s the only one of its kind, and I’ll probably never see one like it again!” She asked me if there was room for the loom in my house, even in the hypothetical event of everything being completely clutter-free. Unfortunately, the answer was “No”. Magda told me emphatically: “Get rid of the loom!”. It helped quite a bit, and I felt resoundingly comforted and relieved by her straightforward advice.
Yesterday, Roxi sent me picture of the space she cleared for the loom, and I felt even more reassured that I was doing the right thing, and very pleased by the confirmation that she is the right person for the loom. (Read about this trade in Roxi’s words.)
It’s now Saturday evening, and I’ve waved goodbye to the loom being hauled away earlier today:
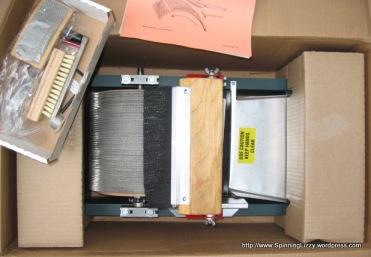
Hello, new drum carder:
I feel a little shell-shocked, but not devastated. It was a major and difficult step for me. I think of all the times I have been blessed with unique, one-of-a-kind treasures, and I’m happy I can contribute to that flow of blessings and pass on some to others. And I’m very slowly making progress towards that goal of a clutter-free house.
1 October 2011 Posted by SpinningLizzy | Weaving | barter, countermarch, countermarche, decluttering, friction brake, loom, Shaw Island Fleece Company | 19 Comments
Vanquishing Bergman Tie-Ups
Beauty, my 45″ Bergman loom, has been calling me to weave. Everything, anything else I was doing, but I could not escape the angst I felt about not using the Bergman.
I was bothered by a couple points; I had sorted out 800-plus string heddles (the wrong way — see “To Meddle With Treddles And Heddles“, and I did not have any tie-up cord. I did not want to use texsolv, as I wanted to preserve the original look of the Bergman, which was cotton clothesline cording. I checked at the major hardware stores in my area, Lowes and Home Depot, to no avail. Nothing dense, non-stretchy, and made of natural fibres to be had. I planned to spin flax, but finally chose ramie as a slightly easier material to work with. After spinning a fair amount, I found it difficult to ply enough to make the necessary thickness (I would have to spin, ply, and cable ply something like ten of the singles I was producing). However, the resulting samples were tooooo stretchy. I turned my efforts to braiding a cord, either by lucet or kumihimo. I never got as far as kumihimo, as I found my most tightly-braided lucet cord even more stretchy than my cabled plies, and took forever to produce even a foot. Why muster any enthusiasm to re-sort the heddles when there was not cording to be had? I was flummoxed.
Last Wednesday, I began a correspondence with Kati Reeder Meek, a long-time Bergman weaver and weaving instructor. Her inspirational words to me were: “I get my cord from Ace Hardware”. I was saved! She told me of the Ace-branded 3/16″ sash cord. It was after 10 pm (stores were closed) before I had that information, so I put my time to good use by clearing out the boxes where my loom wings needed to unfold and my bench needed to sit.
With the loom folded, there is just enough pathway to access the other side. Some day, I might post on something to the effect of “I Started Weaving And Cleaned Up My Act.” (DH says, “Oh yeah, except for the four looms stacked outside.”)
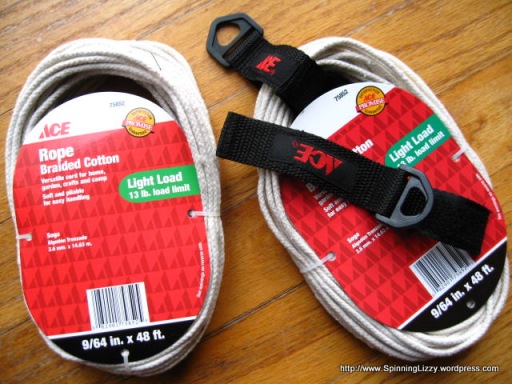
After breakfast the next morning, I looked neither left nor right, neither dithered nor dallied; but hied myself away to the small Ace Hardware store three minutes away to get some sash cord. (The joke is that both Lowes and Home Depot are at least fifteen minutes farther…) Look what I found instead!!!
Wonder of wonders, the braided rope is an even better size match to the original cord on my loom, and even comes bound with a velcro strap, handy for a myriad of purposes! At 9/64″, it’s slightly thinner than the sash cord:
And, it’s cheap! I purchased six bundles for less than $27.00; that was enough cording for all 160 holes in the upper and lower lamms. By nighttime, I had cut all the cords and dipped three inches of the ends (one end per cord) in beeswax. Kati uses dilute white glue to harden the ends; I decided on beeswax because it dries faster, and I love the smell. Immediately when dipping the ends in wax, I used disposable chopsticks to squeese any excess liquid down; it is important to keep the ends as thin as possible.
Using information from Trapunto, I cut the eighty, 17″ lower lamm cords, and eighty, 23″ upper lamm cords. Her site is a treasure trove of Bergman lore! For other Bergman delights, check out Deborah’s site; she “found” her loom after I found Beauty, but has been weaving merrily away for months already.
Prior to coming to my home, my Bergman had been sitting, unused, in someone’s garage for thirty years. Except for cording, she is amazingly complete. This was fortunate for me, as I only needed to duplicate the lengths of the cord present, and mimic the manner of stringing. I missed only one loop from the treddles; a bit of copper wire served very well as a threading needle:
By midnight, I had cords in the holes of every lamm. As there were only six original cords, I replaced them for uniformity (new cords would stretch more than the old).
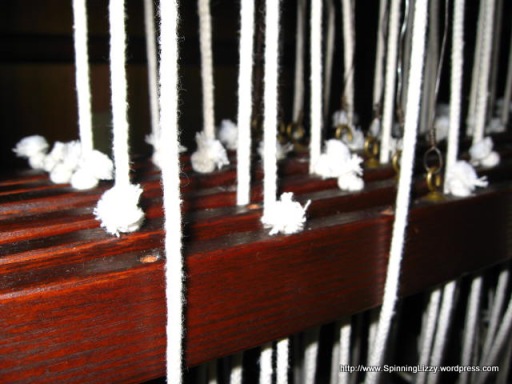
Only five of the cords were difficult to thread, “but when she was bad, she was very bad indeed”. I was very glad for the extra slimness of this rope over sash cord. Pulling hard on the cords while rolling on the beeswax end helped to stretch it thin enough to thread. You couldn’t do that with glue-tipped ends! (Well, you may not need to…) When two of the holes did not thread even with the thinnest cord ends, it turned out that they were blocked by dust from thirty years’ storage. Keep something like an awl or thin dowel on hand for this! Trapunto recommended starting with 40 cords each for the upper and lower lamms. I cut all 160, with a hope that I could leave them all on the lamms and never bother with threading the holes again. I don’t know if that would work or not; when I began the tie-up, it was too messy and confusing to deal with, so I removed the extras at that time. For the next project on this loom, I’ll do my tie-up first, beam on the warp, then do any adjustments to the tie-up afterwards.
I re-sorted some of my heddles; for older countremarche looms, it’s best to keep the shafts as light as possible by putting on only the heddles needed. I did not have a pattern in mind at the time, so I counted out five hundred heddles, figuring on fifty heddles per shaft plus some extras for repeats.
It took an afternoon for this mess:
To become this:
I used plastic binder rings and safety pins to separate and organise:
I chose a pattern that required only thirteen or fourteen heddles on six of the shafts, and thirty-nine on the remaining two. I decided to leave the extra heddles on the shafts, with the clips still intact. If I ever get around to sorting the remaining heddles, I might put them on and check the resulting performance.
Metal pin rods come with the Bergman to lock the cloth beam into place:
Are these absolutely necessary? I’m a bit worried that if I take up the breast beam and forget about these, I’ll bend or snap them when folding in the front wings.
At this point, the jacks must be locked in place in the castle with locking pins (that look just like the pins locking the cloth beam above). Only after the tie-up is complete, and ready to weave are the locking pins in the jacks removed.
The shafts are suspended from the jacks on two sides, and need to be adjusted to an even height by adding or subtracting loops from the side hooks:
After the shafts are even, adjust the cord from the (middle of the) bottom shaft bar to the upper lamms until the lamms are at the same height.
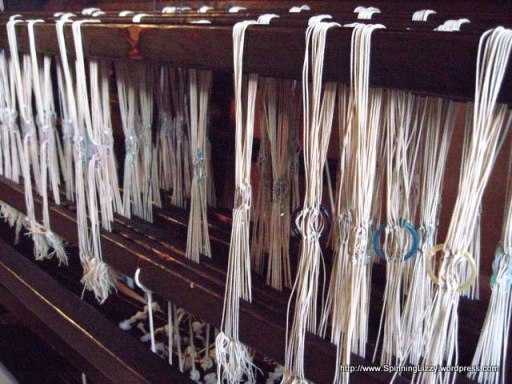
Metal wire runs from the jacks down to the lower lamms. Please note that the wire for each lower lamm needs to fall behind the corresponding upper lamm. The wires are suspended between the two sets of jacks by seine cording. After the wires are connected to the lower lamms, adjust them (lower lamms) for height by adding or subtracting loops of the seine to the hooks :
As Beauty’s inaugural warp, I decided to set myself up to succeed by winding 166 ends of thick Lily Sugar ‘n Cream cotton for dish towels, to be sett at 10 epi. I do have the Bergman warping reel, but I recently purchased an old Gilmore warping board to create more even warps. The silverware drawers under the fish tank was the only place I could prop the board to wind at a comfortable height.
I suspended the two selvedges from wood pirns; I hope to create selvedge spools eventually.
The warp unwinds from under the warp beam, over the back beam (through raddle, back-to-front), then under the back beam forward towards the heddles. I thought I had cut plenty of wood sticks to pack the warp beam, but I ran out quickly, and had to finish with paper.
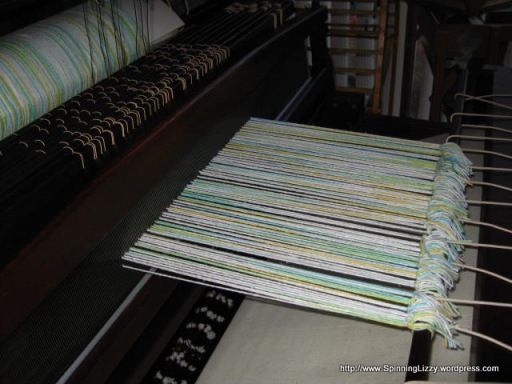
My warp (on original lease sticks) brought to the front of the loom:
I cut slits into plastic foam (computer) packing to hold the lease sticks apart. I still tie the ends with yarn just in case!
Bergman looms abound in thoughtful touches. There are hooks under the castle to suspend lease sticks for ease of heddle threading. First, I tried the front set of hooks (I had to use the velcro straps from the rope!):
I preferred the second set of hooks closer to the warp beam:
I sat on a low (8″) stool, and the the warp threads were at the perfect height for threading the heddles:
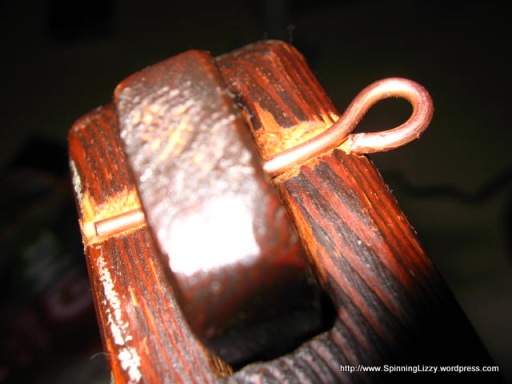
I lost the metal screw (the previous owner only had the one) that held the beater cap in place on the beater, so I found some very thick copper wire and made new locking pins:
With the beater lashed into place, it’s time to sley the reed!
Unfortunately, my warp threads just skim the the lower part of my heddle eyes; it’s recommended that they run through the eye centres.
The remedy for this is to adjust the seine cording on both sides of the shafts to lower them; unfortunately for me, most of my shafts are already at their lowest possibility (you can see this in my earlier photo above). This means I need to replace the seine with some of longer length. I decided to leave these as they are for now, and play “wait and see”.
I tried to work on the treddle tie-up from the front of the loom. I lifted up the front beam (with the warp and apron) and set it back on its pegs on the castle, for easier access to the treddles:
I even took the treddles off the front wings and laid them flat on the floor so I could sit on them while making a preliminary tie-up.
With the cramped space I had behind me, it just wasn’t comfortable. As this loom is not too heavy, it was just easier for me to move the loom forward temporarily, and work from the back. The first thing I did was remove any unneeded cording; it was too messy to sort all the cords, and I had no idea whether they would hamper the weaving if I left them on.
Before this, I have only tied up my Rasmussen table loom to floor treddles in a direct tie-up. I had heard many reports of countremarche tie-ups to be difficult and confusing. I feel they are neither! Not even more complicated, just more cords to tie. Again: Tying up a countremarche is NOT mysterious or difficult!
My loom has eight shafts and ten treddles. For each of the eight shafts, there is a set of corresponding upper and lower lamms. Each lamm has ten holes, each corresponding to a treddle.
Because there are only four loops on each of my treddles; I dedicate the first loop to attaching any cords from (lamms corresponding to) shafts one and two, the second loop for cords from shafts three and four, the third for shafts five and six, and the fourth for seven and eight.
Important points to remember for countremarche looms: 1) Lower lamms raise a shaft up, while upper lamms bring a shaft down, and 2) Any time a portion of the shafts are raised, the rest of the shafts need to be lowered.
If, for example, we decide to tie treddle one to raise shafts 1, 3, and 5; then it must also lower shafts 2, 4, 6, 7, and 8. Since treddle one is to be tied up, only the cords from the first hole (directly over the treddle) of all the lamms will be used. To raise shafts 1, 3, and 5; remove cords (from the first hole of each lower lamm) corresponding to shafts 2, 4, 6, 7, and 8. To lower shafts 2, 4, 6, 7, and 8; remove the cords (again, the first hole on the upper lamms) corresponding to shafts 1, 3, and 5. I would tie up as follows:
Treddle one, loop one: Tie up cords corresponding to shaft 1 on the lower lamm and shaft 2 on the upper lamm
Treddle one, loop two: Tie up cords corresponding to shaft 3 on the lower lamm and shaft 4 on the upper lamm
Treddle one, loop three: Tie up cords corresponding to shaft 5 on the lower lamm and shaft 6 on the upper lamm
Treddle one, loop four: Tie up cords corresponding to shafts 7 and 8 on the upper lamm (nothing from the lower lamm!)
Believe me, it’s a lot more complicated to write up than to tie-up!
I had chosen Doramay Keasbey’s plaited twill pattern #366 from Carol Strickler’s book of eight-shaft patterns. Treddling sequence was simple: from eight down to one in order. For my tie-up, I decided to dedicate treddles one and six for plain weave. (One raises shafts 1, 3, 5, and 7.) See the first “column” of holes on the far left:
These are the lower lamms; you can see the metal wires connecting to the lamms on the upper right-hand side.
I also decided to alter the treddle sequence (from 8, 7, 6, 5, 4, 3, 2, 1) to: 2, 7, 3, 8, 4, 9, 5, and 10. (1 and 6 reserved for plain weave.) In retrospect, the next time I do this tie-up, I would reserve treddles 1 and 10 for plain weave, then alter to treddle as 2, 9, 3, 8, 4, 7, 5, and 6. I think this would be easier for my feet to find the correct treddles without my looking.
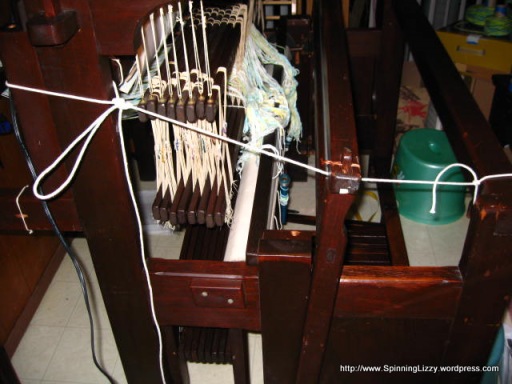
Bergman documentation recommends that, for a height guide, to place the beater cap above the treddles, but below the front wings just under the hinges. I lashed mine into place:
Looking from the front at the lower lamms, you can see that the cords from the upper lamms are placed directly in front of the lower lamm it corresponds to (hole is empty on the lower lamm):
Tie-up finally complete!
I looped the ends loosely around the cords; as my first tie-up on Beauty, I wanted it to look especially spiffy. In the future, I won’t bother. (Time to remove the pins locking the jacks in place in the castle!) I was able to throw the first pick in the wee hours of Monday morning.
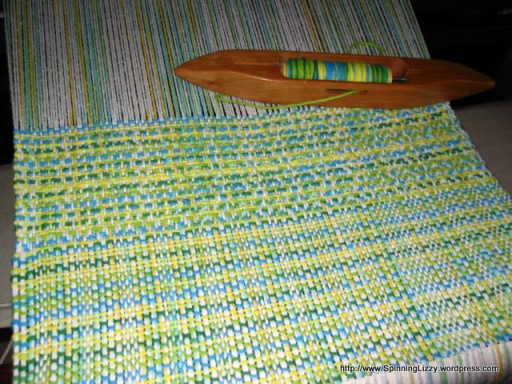
Nothing like the sight of a clean shed to gladden the heart after many hours of work!
(The warp running midway between the top and bottom threads is a selvedge.)
My treddle (6-1/2″) and lamm heights all differed from the recommended. I have no shuttle race, only the slightest of ledges on my beater. However, I’d like the bottom of my shed lowered slightly to be closer to that ledge; it’s a bit higher than I’d like now. I wonder: Deborah has mentioned that one end of her beater was slightly raised — was the beater raised so the shed bottom could skim the ledge? These things, plus the shaft adjustments (to lower the heddle eyes), I hope to rememdy before a second warping.
Weaving on Beauty is a dream; like simutaneously running and dancing on air! The treddles are so easy to depress (compared to my jack table loom), I was able to use my larger and higher Leclerc boat shuttles with ease, everything swishes with such lovely sounds, and the occasional whiff of beeswax so charming! The busy-ness of my yarn made the pattern indistinguishable; after all my work with a full tie-up, I’ll stick to the much more pleasing plain weave to finish this project. I’m looking forward to using these cheerful towels!
19 February 2009 Posted by SpinningLizzy | Weaving | Bergman loom, cord, cording, countermarch, countremarche, rope, tie-up, tying up | 24 Comments
May 2024 S M T W T F S 1 2 3 4 5 6 7 8 9 10 11 12 13 14 15 16 17 18 19 20 21 22 23 24 25 26 27 28 29 30 31 Blogs Featuring Bergman Looms
Looking For Something?
- Ashford Knitters Loom attenuated long-draw auto-reed hook bergman Bergman loom betty linn davenport bobbin winder card-weaving cashmere charlene schurch chemo cap cone winder cording countermarch doupe heddles doupe stick dutch master box loom Easy Weaver electric bobbin-winder English long-draw floor loom folding loom hand-painted warp Harp Harrisville Designs hedy lamarr Howell tablet loom indian head inkle loom Judith MacKenzie Judith MacKenzie-McCuin Knitting Kromski Lendrum lendrum spinning wheel loom Margaret Bergman Peggy Osterkamp plying quill quill attachment raddle Rasmussen Rasmussen loom Rasmussen table loom rigid-heddle loom Rigid Heddle scarf Schacht schacht flip Schacht rigid heddle loom semi-woolen semi-worsted sensational knitted socks singer spindle Spinning spinning wheel Structo Syne Mitchell table loom table loom floor stand tablet-weaving textures and patterns for the rigid heddle loom tie-up toilet paper tube treadle Véronik Avery walnut anniversary edition warping warping reel Weaving woolen worsted Xenakis technique
Visitors To My Site
- 261,174 since 2008.16.6


